Installers are the final arbiters of whether a new building product is a success or a dud. Since reading this, you’re likely involved in how buildings and spaces are designed and built. There’s no denying we all play a part in how well a project turns out, but, as we’ve all seen, the most inspired architect or most competent builder can find themselves in deep if the installation ends up a complicated hassle, or worse. Depending on the installer’s initial experience, a new product becomes the new go-to for everyone involved or crater entirely.
How FritsJurgens Makes a Pivot Door Installer's Life Easier
With the introduction of the pivot systems from FritsJurgens, we've seen nothing less than instant installer reverie and fandom. Based on their feedback, here are ten reasons installers have given us why they're never going back to traditional floor closers after getting to know these high-performance pivot systems.
1. It’s in the door.
Now, we could stop right here.
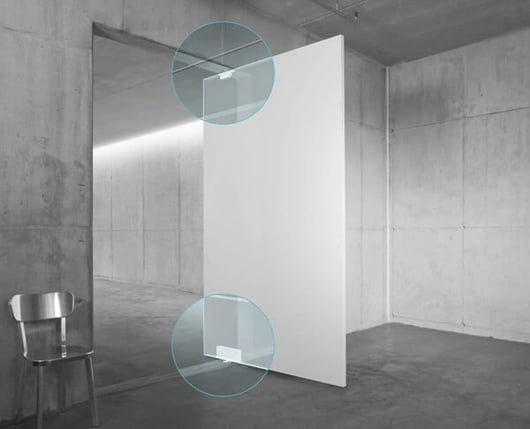 Most of what follows in the other nine ways grow out of this first simple idea. Take that bulky unmanageable monster out of the floor and stick it in the door. Sounds easy, but it has taken FritsJurgens a decade of development to bring that technology to your doorstep. You can now fit a specification-grade floor closer that can handle large and heavy doors of any material into a standard 1-3/4" thick door. It's got hold positions, back check, and latching speed control—everything you expect from a traditional floor closer—just without headaches.
2. Minimal intrusion into the slab.
This one follows logically from the first. The short story here is that you need to drill only two or four small, 8mm(5/16”)-deep holes into your floor material to get the floor plate set and your pivot door moving.
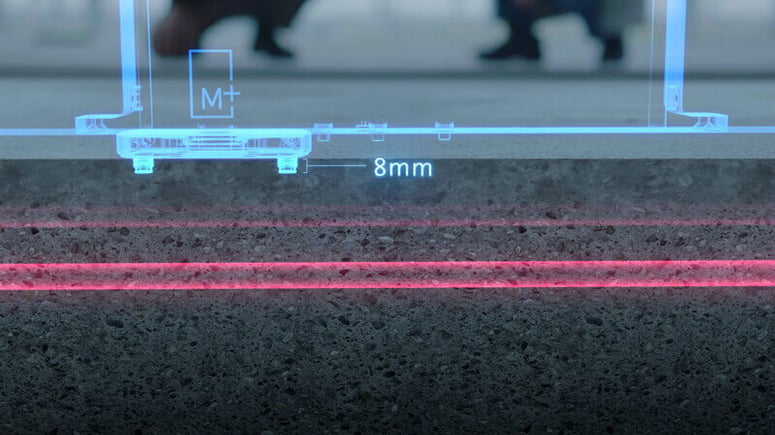 Here we can also focus on the FritsJurgens floor plate. It sits in those tiny holes on the floor and under the door. We say “under the door” because the floor plate that holds up these massive pivot doors can easily rest in the palm of your hand. Your floor plate tucks neatly underneath with a 1-3/4” thick door.
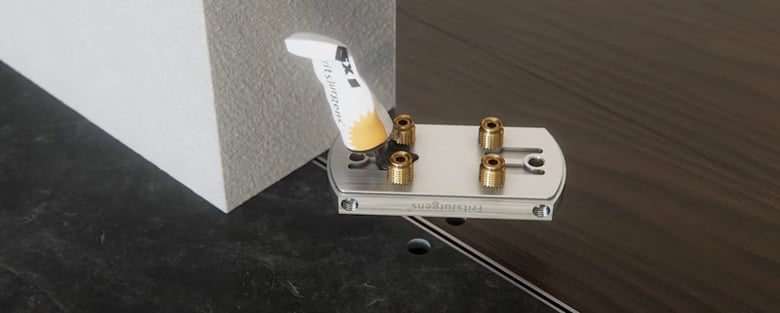
The short 8mm (5/16") studs on the bottom of the floor plate are seated into the holes with a proprietary epoxy. Depending on your floor conditions, you can opt to use either two or four holes. Imagine the door sitting on the seam between two flooring materials pictured above. Utilize the 30mm-long (1-3/16")pins (provided) if you get to the installation and realize a little more purchase into the existing floor is needed.
FritsJurgens thinks of everything.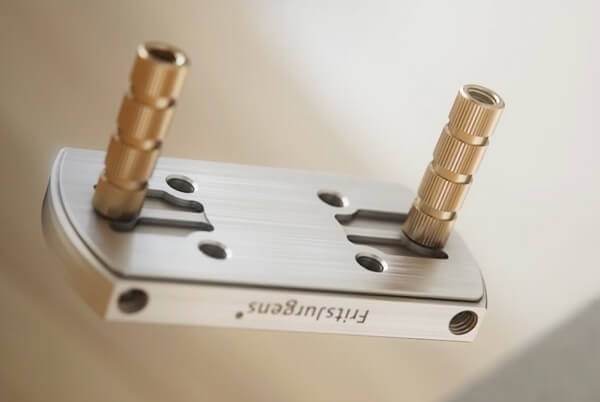
Are you looking for a tighter undercut or zero-threshold detail? FritsJurgens offers flush floor plates for these installations. The total intrusion is still only 12mm (1/2”), still a minimal impact on your floor.
_Web-Optimal_060722.jpg?width=780&name=Screen-Shot-2022-06-01-at-10-(1)_Web-Optimal_060722.jpg)
And on top of that, the top pivot is also entirely inside the door.
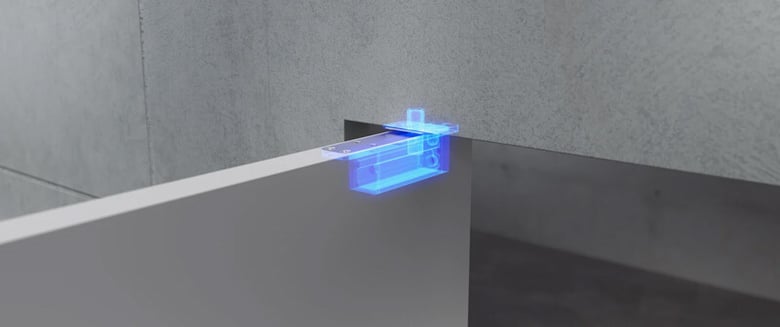 All the installer needs in the header or the ceiling is a hole for the top spindle sleeve and two screws to fix the ceiling plate. Again, it has minimal visual or structural impact and can be done at installation.
3. No need to rent an x-ray machine
If your project has planned for or has existing in-slab radiant floor heating, FritsJurgens being in the door removes the concerns around this situation.  We’ve heard from relieved contractors who no longer have to rent a scanner—or hire an outside service—to see if there’s something in the slab that might be damaged with a traditional floor closer install. With FritsJurgens, what’s buried beneath can stay safely buried beneath.
4. No-fuss change orders: Move the location or flip the handing at the last minute.
FritsJurgens allows you the flexibility to wait until the last minute to decide on exact door placement or handing. No longer just a "nice to have," with those two little holes in the floor and the two screws into the ceiling plate, your client's indecision won't result in curse-inducing emails, multiple phone calls, and budget-draining on-site consultations. The flexibility you get with FritsJurgens ensures quieter weekends and higher on-site morale for everyone.
Now you have it.
5. Save $2000 per opening.
Watching cement dry is a tedious and costly pastime. Take away all the digging, cutting through rebar, cleanup, and coordinating multiple trades over multiple days. Instead, bring in the door after everything else on the project is done. Wouldn’t that be more cost-effective?
We’ve heard from estimators that their rule-of-thumb is to add an average of $2000 to the labor cost for preparing and installing a pivot door with a traditional in-floor closer. Some may point out that the higher capacity FritsJurgens models are more expensive than conventional floor closers. However, estimators who include installation in the total cost of the job understand that specifying FritsJurgens saves you money. And might help you land the project.
So, how long does it take? Installers of doors with FritsJurgens inside report that installation takes two people 20min to an hour, depending on the size of the door. They also tell us about the crowd that gathers to watch as they get the big pivot door up and adjusted the time it takes to have lunch.
Door’s up. Everybody is back to work.
6. No need to build a tent around your hole in subzero temperatures.
“Wish I’d known about you this last February!” exclaimed an installer from the high Rockies when he saw the FritsJurgens System M for the first time. He told us about the windy, subzero day and the hacked construction schedule. They were prepping the slab for a big front entrance pivot door. They’d arranged a leave-out for the bucket closer and had to get the area around the leave-out high enough for the cement around the closer bucket to cure. He had to build a little heated tent that they babysat all day to ensure the cement was correctly set.
7. Fewer tools to lose on the job site.
Here are some tools and supplies you won't need to install a FritsJurgens pivot closer.
Trowel, bucket, jackhammer, core drill, water, cement, and angle grinder(for the rebar).
 Plus a pile of patience.
Here are all the tools you’ll need to install any door with FritsJurgens inside: 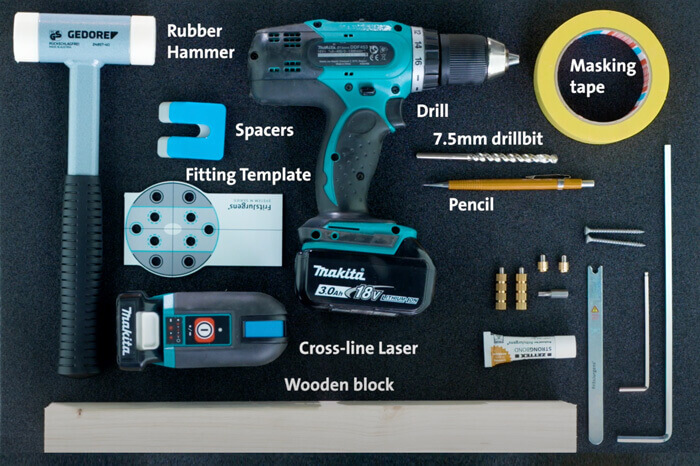
Rubber hammer, spacers, drill, 7.5 mm drill bit, fitting template, cross-line
laser, wooden block, masking tape, pencil, and setting tools (provided).
That, and a case of self-satisfaction.
8. No extra meetings with the condo board or historical commission.
 This isn’t an installer thing, but it deserves a place on this list. We know of projects that lose their pivot doors when the existing building owners require special permission, insurance (and fees) to dig into an existing floor. Whether a residential building or commercial project, these surfaces can be off-limits to alterations as significant as a traditional floor. FritsJurgens is the ideal solution for any retrofit situation.
9. Adjust all you want—after the door is in place.
First, adjustment of the door position.
Installers are the first to discover discrepancies between the plans and the as-built opening. Stuff can happen during the installation, fine-tuning the position after the door is up. FritsJurgens has allowed for some tweaking—we call it precision.
The System M/M+ floor plate allows adjusting the 0° or closed position. This is handy when the plate hasn't been perfectly set, and the door is not reaching its desired relationship with the frame or adjacent door panel. Loosen the four-set screws on the edge of the floor plate and radially adjust the door ±2.5° until it's perfect and flush with its surroundings.
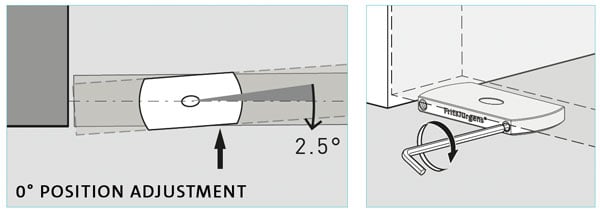
You may also fine-tune the gaps around the door by adjusting the top pivot accessed via the edge of the door. With a hex key, you move the top spindle laterally ±5mm to plumb the door and adjust the gaps.
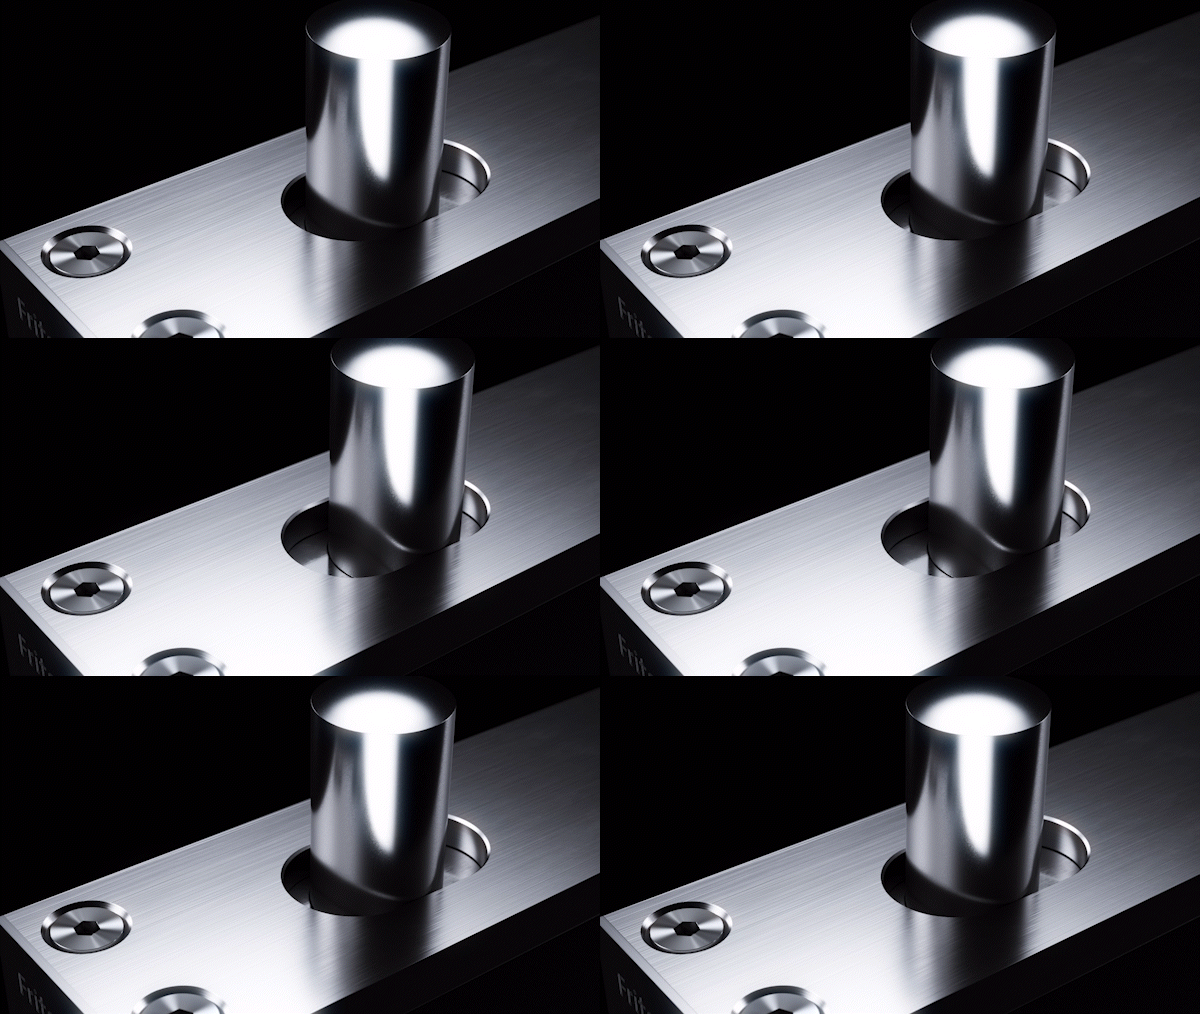 Second, adjustments to how the door moves.
Welcome to the fine art of tuning the movement of the pivot door. This lies at the heart of FritsJurgens' success with installers. For the System M+ bottom pivot, the three adjustment screws are easily accessed under the door using the adjustment wrench.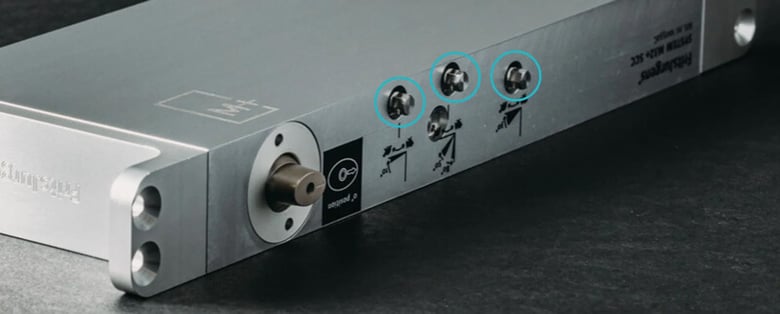 To make it easy for newbies, FritsJurgens provides a handy adjustment card. Place it on the right side of the door for your installation and follow the directions.
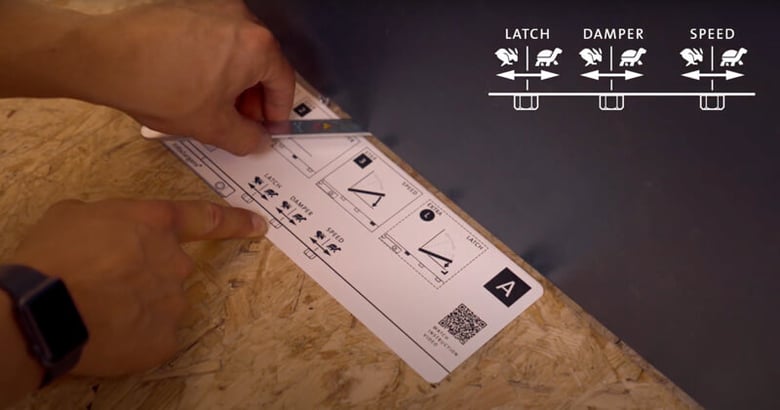
Step 1. Adjust the overall damping and backcheck. This is the same adjustment as System M and governs the overall strength of the closing speed, and the backcheck strength.
Step 2. Adjust the speed of the door from 30° to 0°. This balances the need for strong backchecks with the desire for a more gradual, slower approach to the final closed position.
Step 3. Adjust the latching speed. This adjustment helps pull the door into the frame during the last 10° of travel for doors with latches, drop seals, and gaskets. Note that the hinge ships in the "off" position with the Latching Speed.
10. No big ugly cover plate or terrazzo pan.
Looking at pivot doors on Instagram, it’s easy to spot those that don’t have FritsJurgens inside. You’ll see a big closer cover plate spilling out from beneath both sides of the door or an attempt to hide the closer cover. They both belie the simplicity of form that owners and designers wanted when they decided to specify a pivot door. Of course, the coordination required to pull off a terrazzo pan can make installation even more complicated.
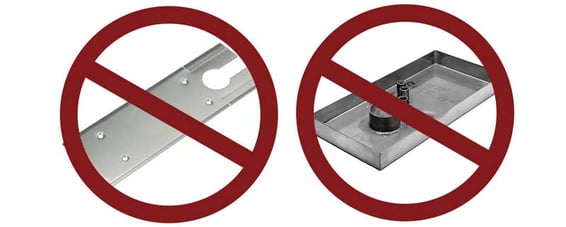 With FritsJurgens, no floor plate needs to be removed to adjust the door. All the fine-tuning of the hardware can happen on the door as installed.
11. BONUS REASON: It's all in the door.
It's okay to say it twice. Once for the installers, and once again for everyone else who deals with it throughout the project. There's nothing more liberating for architects than having expected limitations removed.
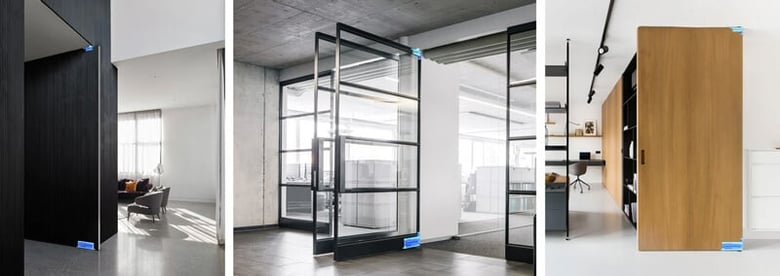
For contractors who are managing multiple complicated installations within an already complex project, not having to worry about the pivot doors until the very end saves them time and money. They can safely assume the installation will come off without a hitch.
For the installers, they end up looking like heroes every time.
Relax, it's all in the door.


